How to Get the Best Underwater Photos in Cozumel: A Pro's Guide (2026)
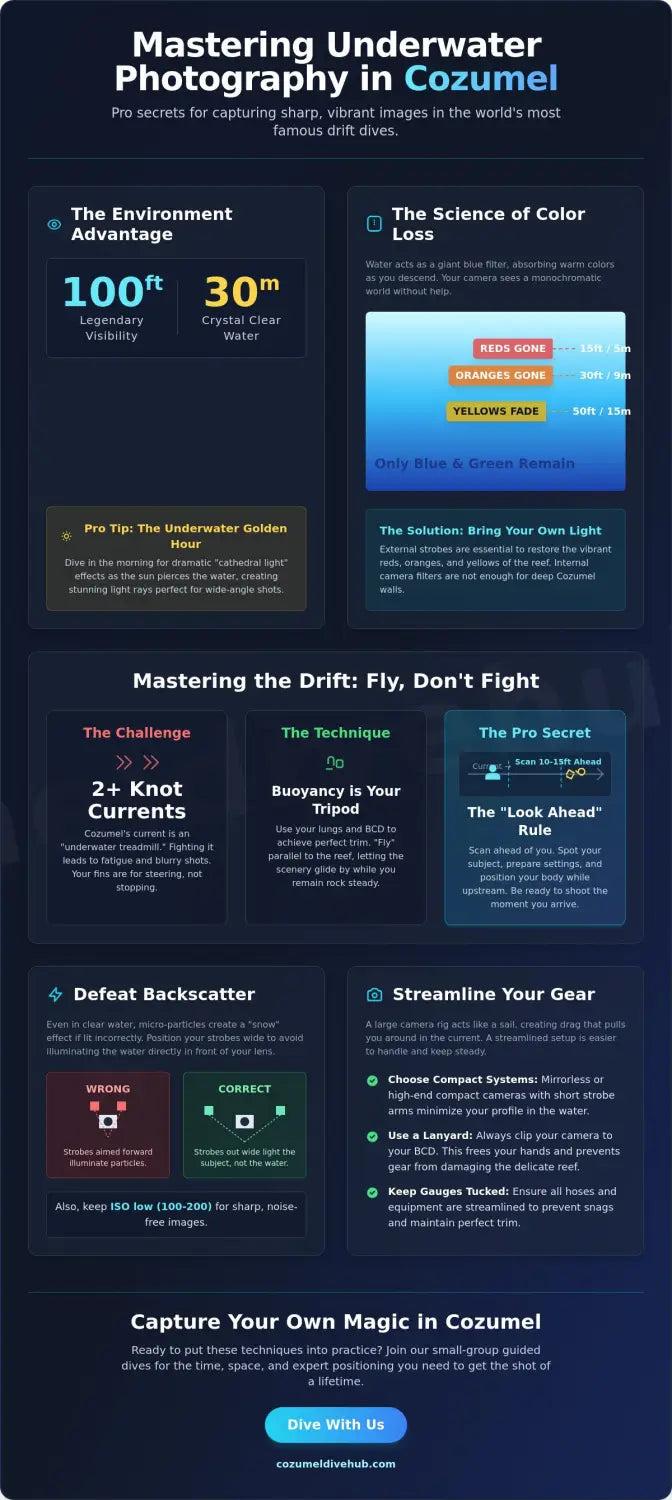
Underwater photos in Cozumel come out blue because seawater strips red by about 5 metres, orange by 10 and yellow by 20. The fix is not a better camera: get within a metre of the subject, then put the red back with a filter or a strobe.
Carmen Novelo · May 6, 2026 · 17 min read
Underwater photos in Cozumel come out blue because seawater strips the warm end of the spectrum almost immediately: red is effectively gone by about 5 metres, orange by 10 and yellow by 20. On a typical reef dive at 18 metres, half the colours you can see with your eyes are no longer reaching your sensor. The fix is not a better camera and it is definitely not zoom. It is proximity and light — get inside a metre of the subject so there is barely any water left to filter the image, then put the red back with a filter in shallow ambient light or with a strobe or video light anywhere deeper. Cozumel adds one complication that generic guides skip: almost all of it is drift diving, so you get a single moving pass at every subject. You cannot stop, hover, reposition and try again. That single fact should shape how you set up, how you approach and what you shoot.
This guide covers the physics of colour loss, the close-focus rule that fixes most bad images, how filters, video lights and strobes actually differ, white balance in practice, drift technique, and a full section on getting usable results from a GoPro — the camera most visitors actually bring. If what you want is structured instruction in the water rather than a reference page, the underwater photography course options in Cozumel are covered separately.
Why Do Underwater Photos In Cozumel Look Blue?
Water is roughly 800 times denser than air, and it does not absorb light evenly. The long wavelengths at the red end of the spectrum are absorbed first and fastest, and the short blue wavelengths travel furthest. That is why the ocean looks blue and why an unlit photograph taken at 20 metres looks like a monochrome study in teal, no matter how vivid the reef appeared through your mask.
| Colour | Effectively gone by | What that means underwater in Cozumel |
|---|---|---|
| Red | ~5 m / 15 ft | Sponges, gorgonians and blood look brown or grey before you have even finished descending |
| Orange | ~10 m / 33 ft | Elephant ear sponges and fire coral flatten to olive |
| Yellow | ~20 m / 66 ft | The splendid toadfish's yellow fins read as pale grey on a deep ledge |
| Green | ~30 m / 100 ft | Only blue is left; this is the depth of a Punta Sur or Maracaibo profile |
| Blue | ~60 m / 200 ft | Beyond recreational limits — everything is dark |
Two things follow from that table. First, colour loss starts shallower than most divers expect — you are already losing red on the descent line, not at depth. Second, the loss is a function of the total distance light travels through water, not just your depth. Light from the surface has to reach the subject, then bounce back to your lens. A subject 3 metres away at 12 metres depth is being photographed through 15 metres of water. A subject 30 centimetres away at the same depth is being photographed through roughly 12.3 metres. That difference is visible in every frame.
Get Close, Then Get Closer
This is the single most useful technique in underwater photography and it costs nothing. Every centimetre of water between your lens and your subject scatters light, drains contrast and removes colour. Zooming in does not help, because the water is still there. Physically moving the camera closer is the only thing that removes it.
Practical targets:
- Wide angle: close-focus wide angle is generally shot at under 60 cm / 2 ft from the subject, and the best frames are often closer still. Foreground coral almost touching the port, reef and blue water behind it.
- Macro: a few centimetres. If you are more than an arm's length from a flamingo tongue snail, you are shooting water.
- The drop-off point: contrast and colour from a strobe start falling away noticeably at around 1.5 m / 5 ft. Treat that as your outer limit, not your working distance.
The practical consequence in Cozumel is that your buoyancy and trim matter more than your gear. You cannot get 40 cm from a coral head in 1.5 knots of current without precise neutral buoyancy and a horizontal body position. Divers who cannot hold that position end up shooting from two metres out, which is why their images look washed out even in 30-metre visibility. Buoyancy training — a Peak Performance Buoyancy specialty or the buoyancy work inside Advanced Open Water — buys more image quality than a strobe upgrade.
Filter, Video Light Or Strobe: Which One For Which Dive?
These three tools do different jobs and are frequently confused. A red filter does not add light; it subtracts blue so that whatever red remains in the ambient light is proportionally stronger. A strobe or video light adds full-spectrum light that was never there. That distinction determines when each one works.
| Tool | Works when | Fails when | Best Cozumel use |
|---|---|---|---|
| Red filter | Bright ambient light, roughly 3–15 m / 10–50 ft, sun behind you | Deeper water where there is no red left to boost; any dive where you also run lights | Columbia Shallows, Paradise Reef, snorkelling over the shallow reef |
| Video light | Continuous light for video, close subjects, dark spaces | Beyond ~1.5 m; drains battery; can be underpowered for wide reef scenes | Peeking under ledges for toadfish, swim-throughs, any GoPro or video setup |
| Strobe | Stills, wide-angle reef scenes, freezing motion, any depth | Positioned badly it lights the particles instead of the subject | Wall dives at Santa Rosa and Palancar, close-focus wide angle |
The rule people get wrong: never run a red filter and a light at the same time. The light already contains red, so the filter pushes the illuminated foreground to an unnatural warm cast while the background stays blue. Filter or light — never both. On a deep wall dive the filter is doubly pointless, because below about 15 metres there is no meaningful red left in the ambient light for it to work with; the result is simply a dark, tinted frame.
If you do use strobes, position them wide and slightly behind the front of the housing, aimed forward rather than inward. Backscatter — the "snowstorm" of lit particles — happens when the light cone crosses the water column directly in front of the lens. Cozumel's clear water reduces the problem but does not eliminate it, especially over sand channels where a careless frog kick from the diver ahead has stirred up sediment.
How Should You Set White Balance Underwater?
White balance is the third lever, and it is separate from filters and lights. There are three workable approaches, and which one is available depends on your camera.
Manual (custom) white balance. Point the camera at something neutral — a white slate, a sandy patch, the palm of your hand — at the depth you intend to shoot, and tell the camera that is white. It recalculates the whole colour response for that water column. This produces excellent results for ambient-light video and it is the reason experienced shooters re-do their white balance every time they change depth significantly. It stops working once the ambient light has no red left to rebalance.
Shooting RAW and correcting later. A RAW file keeps the full sensor data, so a photograph that looks blue on the camera screen can often be recovered in Lightroom or Capture One. This is the safest option for stills in a drift, where you have no time to fiddle with settings mid-pass. It cannot invent colour that never reached the sensor, so it works better at 10 metres than at 30.
Auto. More capable than its reputation on recent cameras, and the default recommendation for GoPro (see below). Its weakness is inconsistency: as you swing from a bright sand patch to a shaded swim-through, the camera re-decides what white is, and your footage shifts hue mid-clip.
For stills, RAW plus strobes makes white balance almost a non-issue. For ambient-light video, manual white balance is the strongest tool you have.
How Do You Shoot In A Drift?
This is the part that makes Cozumel different, and it is where most visiting photographers lose their images. The Yucatán Current runs north through the channel and drives the reef dives along the west coast. You are moving, the reef is not, and you do not get a second pass. Fighting the current to hold position burns air, wrecks your trim and puts you in contact with the reef.
Compose Upstream, Not On Arrival
Scan 4 to 5 metres ahead of yourself. Identify the subject, decide the frame, set exposure and position your body while you are still upstream of it. By the time the current delivers you into range, the only thing left to do is fire. Photographers who wait until the subject is beside them get one panicked frame, usually at the wrong distance.
Use The Current As A Dolly
A slow, steady drift past a reef wall is a camera movement you could not produce by hand. Point the camera slightly ahead of your direction of travel and let the flow create the pan. Exhale gently to descend a metre, inhale to rise — that is a crane shot with no equipment. Kicking during a shot is what makes footage shake; the current itself is smooth.
You Cannot Brace On The Reef
Inside Parque Nacional Arrecifes de Cozumel it is prohibited to stand on or hold onto the coral reef. Recreational divers are also not permitted to carry gloves or knives, non-biodegradable sunscreen is banned, and feeding or collecting marine life is forbidden. This is not etiquette, it is marine park regulation, enforced, and the marine park fee every diver pays funds it.
That rules out the single-finger reef anchor that photographers use elsewhere. If you genuinely need to stabilise for a macro shot, the only acceptable contact is a dead patch of bare rock or sand well away from living coral — and even then, no-touch diving is the standard to aim for. In practice, the better answer in Cozumel is to accept the pass, shoot it moving, and improve your buoyancy so you do not need an anchor at all.
What GoPro Settings Work For Cozumel Diving?
A GoPro is the most common camera on any Cozumel dive boat, and it has specific limitations that no settings menu fixes. It has a fixed, very wide lens behind a flat port, which means the field of view is enormous and everything looks further away than it is — objects appear about 33% larger and closer to your eye than they really are, and the lens then pushes them back again. A turtle three metres away that filled your mask becomes a small shape in the corner of the frame. On a GoPro, "get close" is not advice, it is a requirement.
The second limitation is focus. Without an accessory lens, a GoPro cannot focus closer than roughly 30 cm / 12 inches — anything nearer comes out soft. So there is a narrow working window: close enough for colour and detail, no closer than the minimum focus distance. Screw-on macro and wide-angle wet lenses widen that window and are the single most effective GoPro upgrade for reef work.
The HERO13 Black remains the current shipping flagship at the time of writing. Ignore any advice built around unreleased models.
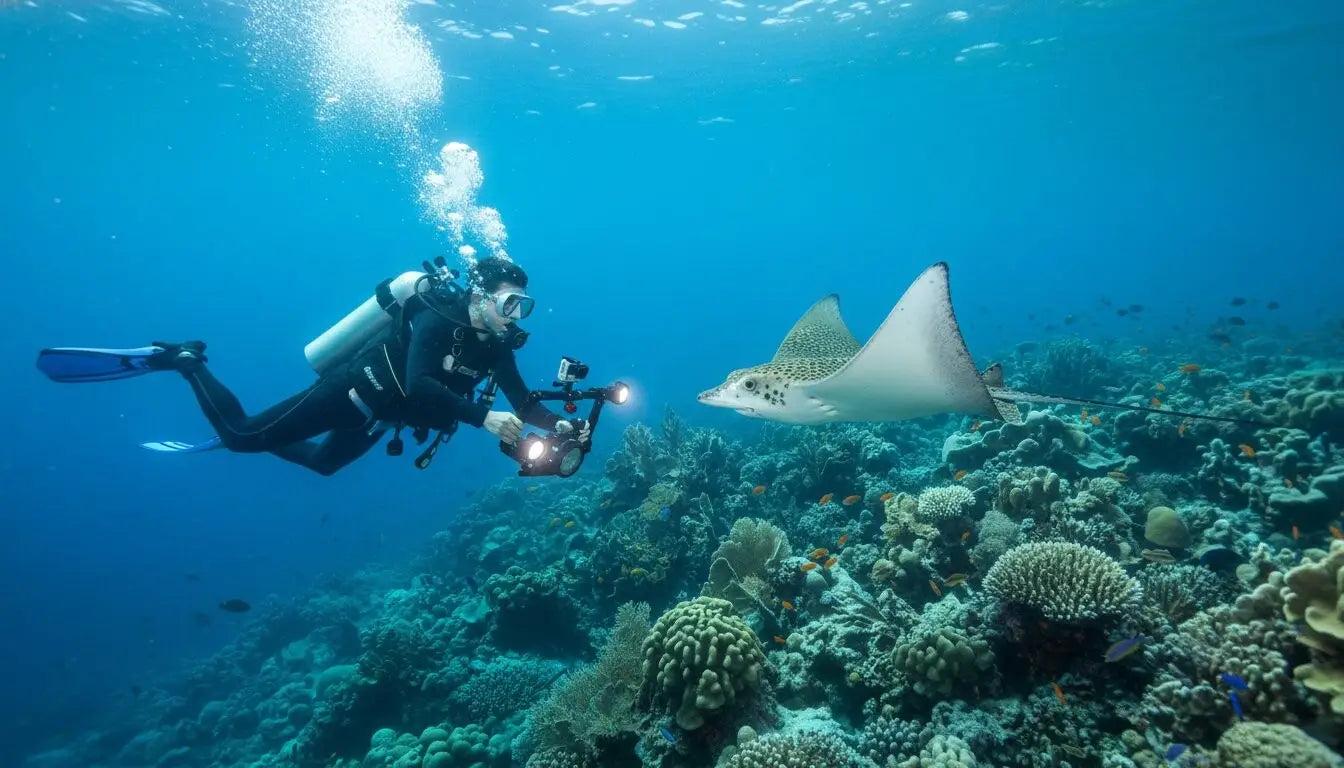
| Setting | Recommendation | Why |
|---|---|---|
| Resolution / frame rate | 4K or 5.3K at 60 fps for reef; 2.7K at 120 fps for slow motion | 60 fps gives you a 50% slow-down in editing, which smooths out drift wobble |
| White balance | Auto | GoPro cannot set a custom white balance off a slate; recent auto performance is genuinely good underwater |
| Colour profile | Natural for straight-out-of-camera; Flat if you will grade the footage | Flat retains more highlight and shadow data for correction |
| Sharpness | Low | Leaves room to sharpen in editing rather than baking in halos |
| Denoise | Medium | Reduces noise in shaded reef structure without smearing detail |
| ISO limit | Cap at 400 in daylight | Prevents the camera lifting ISO and adding grain in swim-throughs |
| HyperSmooth | On | Digital stabilisation genuinely helps against micro-vibration in current |
| Shutter | Auto, or 1/120 when shooting 60 fps | The 180-degree rule gives natural motion blur rather than a strobing look |
Why Does GoPro Footage Look Washed Out?
Two reasons, and only one of them is the camera's fault. The first is physics — the same colour loss described above, which affects every camera. The second is specific to GoPro: it has no custom white balance, so it cannot be told what white looks like at 18 metres the way a mirrorless camera can. That is why so much GoPro dive footage sits somewhere between grey-blue and sickly green.
What actually fixes it, in order of effectiveness: get closer; add a video light for anything within about 1.5 metres; use a red filter only on shallow ambient-light dives and take it off the moment you switch a light on; shoot Flat and correct in editing. What does not fix it: raising the bitrate, buying a bigger memory card, or dialling through Protune menus at depth.
Mounts For A Two-Knot Drift
Head and mask mounts are the most common mistake. They put the lens directly in the path of your exhaust bubbles, and every time you check your gauge the footage swings wildly. A short handheld grip or a compact tray with two handles is far better — two hands on the camera is a stabilisation system in itself, and tucking your elbows into your ribs reduces the drag the current can apply to your arms.
Keep any pole retracted. A long pole magnifies every small hand movement into a visible wobble and acts as a lever for the current. Whatever you use, tether it: a dropped camera in a drift is gone, and it can damage coral on the way down. Large rigs behave like sails in Cozumel's flow, which is why compact setups genuinely outperform elaborate ones here. If you are travelling light, check what the gear rental options in Cozumel cover before assuming you need to bring everything.
Wide-Angle Or Macro: Decide Before You Roll Off The Boat
Most underwater housings lock you into a lens choice at the surface, and Cozumel's topography varies enough that the wrong choice costs you the dive. Deep southern walls reward wide angle; shallow northern and mid-island reefs reward macro.
| Site | Depth character | Best suited to | Why |
|---|---|---|---|
| Palancar Gardens | Coral buttresses, 15–25 m | Wide angle | Towering formations and sand channels need scale in frame |
| Santa Rosa Wall | Sheer wall, often brisk current | Wide angle | Classic diver-against-blue-water compositions |
| Palancar Caves | Swim-throughs and tunnels | Wide angle with light | Beams of light through openings are the whole point |
| Columbia Shallows | 6–12 m, bright | Either, filter-friendly | Enough sunlight that ambient-light colour actually works |
| Paradise Reef | 10–14 m, mild current | Macro | Calm enough to work slowly on small subjects |
| Yucab Reef | 15–18 m, coral heads | Macro | Coral heads with reliable small residents |
| C-53 wreck | 24–30 m, structure | Wide angle with light | Artificial structure and shadow, low ambient colour |
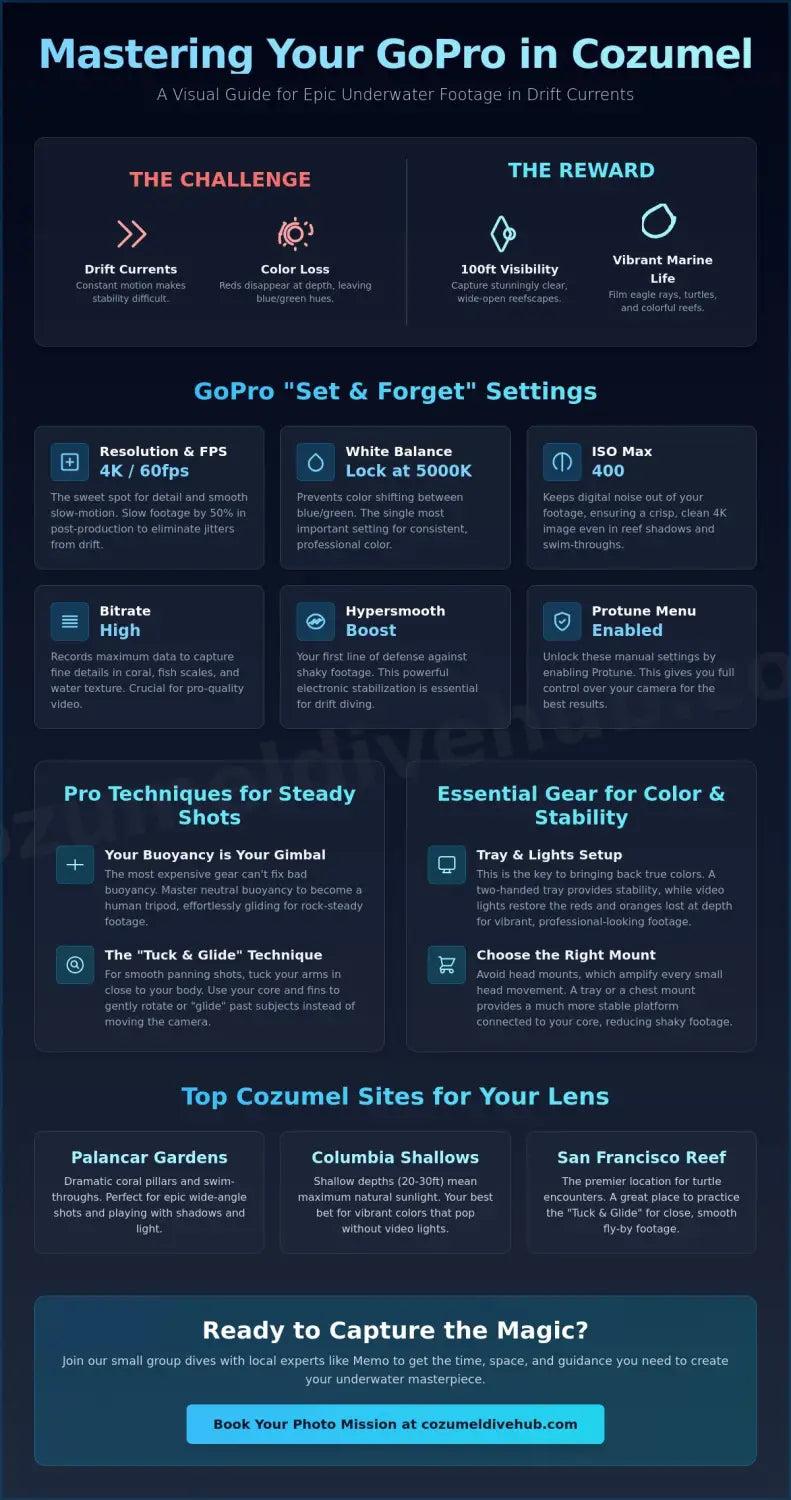
For wide angle, include a diver. Nothing else conveys the scale of a Palancar buttress, and a sea fan or barrel sponge in the foreground with a diver behind it is the shot people remember. Aim slightly upward so the background is Caribbean blue rather than a dark void, and let a strobe handle the foreground colour. The full dive sites guide covers depth and current profiles site by site if you are planning around specific conditions.
How Do You Photograph The Splendid Toadfish?
The splendid toadfish is endemic to Cozumel — it is found essentially nowhere else — and it is the island's signature photographic subject. It also hides. Adults sit under rocky reef ledges and in crevices with only the head and those distinctive yellow-edged fins showing, in exactly the kind of shadow where ambient light has already lost every warm wavelength.
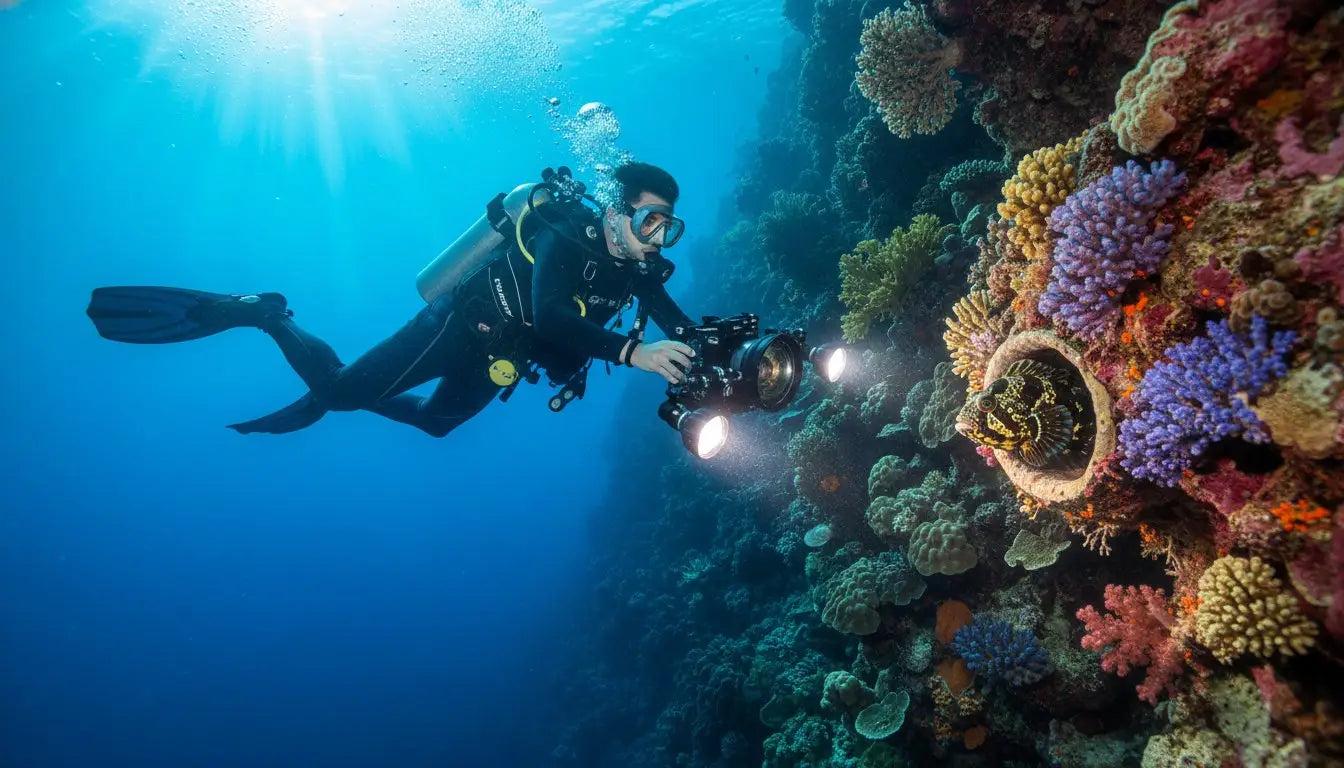
That makes it a lighting problem, not a spotting problem. You need a dive light or focus light both to see it and to give your camera something to focus on, and a light or strobe to reveal the yellow that the water has already removed. Shoot at a small aperture so the whole head stays sharp in a cramped frame, get the lens as low and as close as the ledge allows, and do not push into the crevice — the reef contact rules apply here more than anywhere. A dedicated guide to where splendid toadfish are found in Cozumel covers the sites and behaviour in more detail.
What Makes Cozumel Easier Than Most Dive Destinations?
Three things, and they are worth knowing because they change what you should attempt.
Visibility. Cozumel routinely offers visibility past 30 metres, with warm water in the 26–29°C range year round. Wide-angle compositions that would be impossible in murkier water are straightforward here, and low ISO settings stay usable because there is so much ambient light. Conditions do vary — a norte in winter can shut the port and roughen the water, and the month-by-month conditions guide is worth checking before booking around a shoot.
Strong overhead sun. Between roughly mid-morning and early afternoon the sun is high enough to drive light deep into the water column, which is when shallow ambient-light and filter work is at its best. Early morning gives more dramatic angled light rays for wide-angle scenes. Keep the sun behind you unless you are deliberately shooting into it for silhouettes.
Cooperative subjects. Hawksbill turtles feeding on sponges, spotted eagle rays in the cooler months, resting nurse sharks under ledges and large groupers that tolerate a close approach. The counterweight is the current — which is why the drift diving guide is the other half of learning to shoot here, and why divers newer to the island often start with the beginner's guide to diving Cozumel before adding a camera.
One logistical note that matters more than it sounds: ask before booking whether the boat has a dedicated freshwater rinse container for camera gear rather than a shared bin full of BCDs and fins. Small boats — the six-pack format — also give you more room to work and a group pace that does not leave you behind while you shoot. Carrying your own SMB is sensible on any drift dive, and doubly so if a camera is occupying your attention.
Turning This Into A Dive Plan
The short version: get close, add light or take the filter off, decide wide or macro before you splash, compose upstream, and never brace on the reef. Those five habits will improve your images more than any equipment you can buy between now and your trip.
If you want to build skills rather than just read about them, the specialty course options in Cozumel include underwater photography and buoyancy training, and the dedicated photography course guide compares what PADI and SSI actually cover.
Start planning your Cozumel dive trip — sites, seasons, conditions and operators, so you arrive with the dives that suit the pictures you want to take.
Frequently Asked Questions
At what depth does red disappear underwater?
Why do underwater photos look blue and washed out?
How close should you get to your subject underwater?
Should you use a red filter or a video light in Cozumel?
Can a GoPro set a manual white balance underwater?
What is the minimum focus distance of a GoPro underwater?
How do you take photos while drift diving?
Is it allowed to hold onto the reef for a steadier shot in Cozumel?
How do you photograph the splendid toadfish?
What time of day is best for underwater photography in Cozumel?
Share This Article
Carmen Novelo
Carmen Novelo is a Cozumel native and an active scuba instructor and dive guide on the island. She has spent twelve years diving the Cozumel reef system, and writes about its dive sites, conditions and marine life for Cozumel Dive Hub.